10 minutes
vEnterprise (Home Lab) goes wild Part 2 - Platform Services Controller (PSC) 6.5 Update 1 Installation
Taratadum, time for the second part of my home lab rebuild.
As I said in my previous article I had to go after the “design” to the deployment of my VMware components and the first one (after the ESXis) was the Platform Services Controller (PSC) in order to be able later to point my vCenter Servers to the SSO that I have created. During my deployment I found some weird issues that I was strangling with them a couple of hours until I realize how to work around them.
As you know the new VCSA/PSC Appliance has requirements to have fully working forward and reverse DNS so as well before this PSC deployment I had to create and configure a Windows Server 2016 that will act as a Domain Controller, DNS Server and because I am just a VMware Engineer (so poor) I am using it as a jump host as well. At some point of course will do more stuff than these three. (Yes guys, unfortunately we have limit on the resources even if you pray to the gods, they are only accepting money and not prays :) ).
As I said I met a couple of problems during my deployment so let me point out now in summary what exactly were the problems that I met.
First of all because as I have said in my previous article I like to make my life harder not easier when we are speaking about lab and especially mine I put aside at some point (don’t ask me why) the PSC deployment so I wanted to integrate my ESXi hosts with my domain. At some point I thought okay, 1 min job I will do it and then I can continue with my other tasks….. you can understand that I spent more or less 30-45 minutes in the end so let’s go in my notes. Overall I think the following issue that I had it was because of Embedded Host Client (*/ui) of the ESXi host (as I understood is not accepting the form of Domain\User but it accepts only user@domain.local but let’s put them all together:
The error that I received was the following "Failed - Errors in Active Directory operations." Make sure you have,
- Use the format of
user@domain.localand notDomain\User(this issue was supposed to be fixed since 5.5 but seems that is still out there) - Make sure that you have the ports open on the Domain Controller (TCP & UDP) - 88, 123, 135, 137, 139, 389, 445, 3268 (I didn’t had this issue but I make a note because I checked it during my troubleshoot)
- Make sure
lwsmd serviceis started on the ESXi (normally is started by default but is good to double check it, in my case was stucked) - Have firewall disabled on the ESXi (
esxcli network firewall set --enabled false) in case that without this it didn’t worked I believe this will be the last solution in order to have everything working correctly
In my case was the first point and maybe the lwsmd service was stuck because after I restarted and put as well the correct format as I wrote on the step 1 everything worked fine. Before without the restart and even with the correct format (user@domain.local) was not working properly.
After that and I could rest in piece and continue with the PSC deployment I came to another issue that it kept me working on this for a lot of hours. Just to give you some point of the workaround after the deployment of the .ova import on the ESXi (through the VCSA/PSC appliance installer) it was stuck on the 80% in the phase of "Installing RPM", this may take a several minutes…" I would say that is better to say “…this may take a several years” because in the end was never finished to 100%. On the logs you can find the following errors that I was strangling to solve:
2017-08-18T08:32:32.876Z - debug
[489]pollRpmInstallProgress:getGuestFileErr:ServerFaultCode: The guest operations agent could not be contacted.
2017-08-18T08:32:35.433Z - debug: Updated current session with lstActTm Fri Aug 18 2017 10:32:08 GMT+0200 (Central Europe Daylight Time)
2017-08-18T08:32:42.879Z - debug: initiateFileTransferFromGuest error: ServerFaultCode: The guest operations agent could not be contacted.
2017-08-18T08:32:42.880Z - debug: Failed to get fileTransferInfo:ServerFaultCode: The guest operations agent could not be contacted.
2017-08-18T08:32:42.880Z - debug: Failed to get url of file in guest vm:ServerFaultCode: The guest operations agent could not be contacted.
2017-08-18T08:32:42.880Z - debug: [490]pollRpmInstallProgress:getGuestFileErr:ServerFaultCode: The guest operations agent could not be contacted.
2017-08-18T08:32:52.879Z - debug: initiateFileTransferFromGuest error: ServerFaultCode: The guest operations agent could not be contacted.
2017-08-18T08:32:52.880Z - debug: Failed to get fileTransferInfo:ServerFaultCode: The guest operations agent could not be contacted.
2017-08-18T08:32:52.880Z - debug: Failed to get url of file in guest vm:ServerFaultCode: The guest operations agent could not be contacted.
After showing these errors and tried different things that other people they were mentioning (like AD integration with ESXi, IPv6 disable on the Management Traffic adapter, Forward & Reverse DNS etc) the thing that I did was to go directly on the ESXi and after the import of the .ova I noticed that the Appliance (Photon OS) was powering on the VCSA/PSC but it was staying in the main screen of Photon, so I gave a try to open the console and hit enter in order to see what will happen and after to go with hitting ESC key to the console and see if it will boot or it will start some services or even some failure code in order to understand where is the main problem. Then it started booting with bringing up services & configuring the Appliance based on the configuration that I gave during the installation wizard (VCSA Installer). During this I had the time to drink a coffee silently in my office waiting the configuration to be finished with crossing fingers (of course this has to do with my nested ESXi environment that is not running on some super extreme hardware and is more than enough).
Finally at some point the configuration finished and I got the screen that I could go to the stage two of configuring my Platform Services Controller via the Web GUI. I would like to mention that until this point still the installer was showing 80% of “Installing RPM ….” and it never finished, after some hour and even if my PSC was ready and was working fine I clicked on the Cancel button and let it rest. :)
After these notes I would say that I was quiet happy that at least I found a workaround and I can go now on the installation process of the PSC.
VMware Platform Services Controller Installation - Stage 1
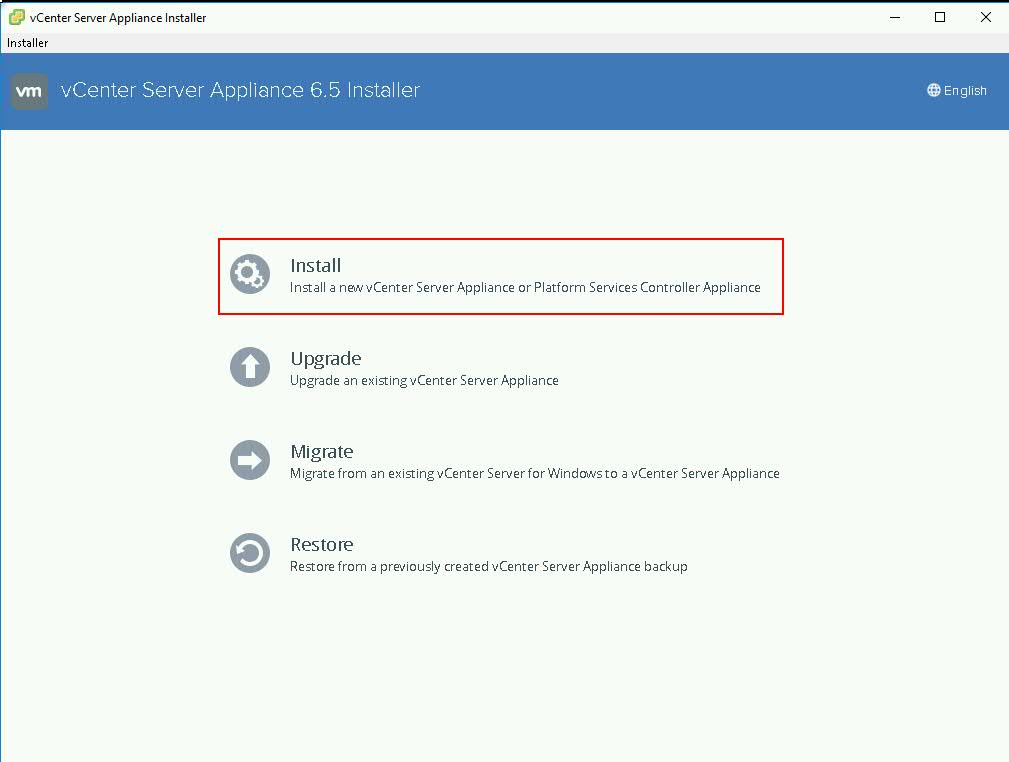
So just mount the ISO Image of the VCSA and run the installer based on the OS you are running. VCSA Installer now supports MacOS, Linux & Windows (so no need of a Windows OS) just click on your Installer, and the process will start with the following screen:
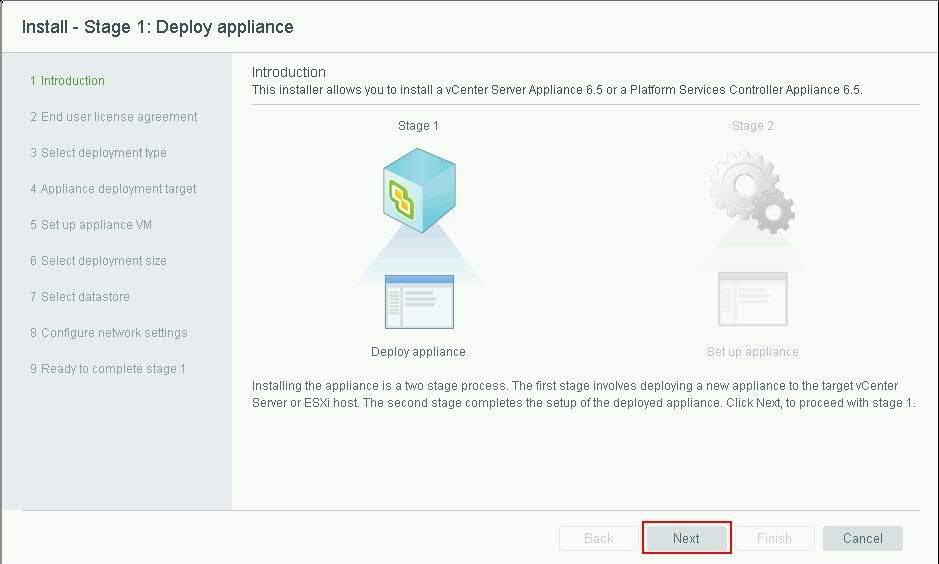
Then it will show you that the installer has two stages (you can do it all the stages in once with using a little bit the cofiguration files of the .ova but I didn’t want to go through this process)
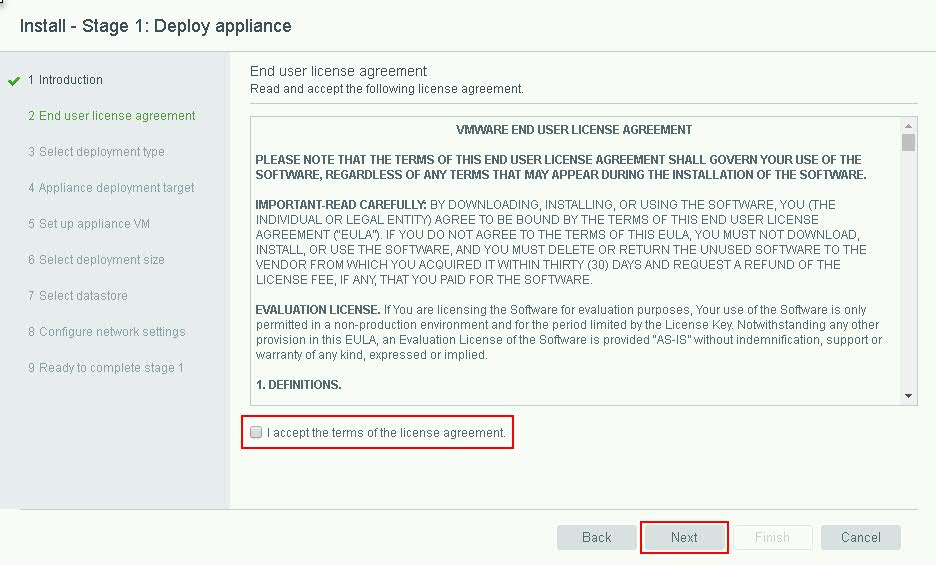
After you have to accept the License agreement that no one is reading (bad bad people)
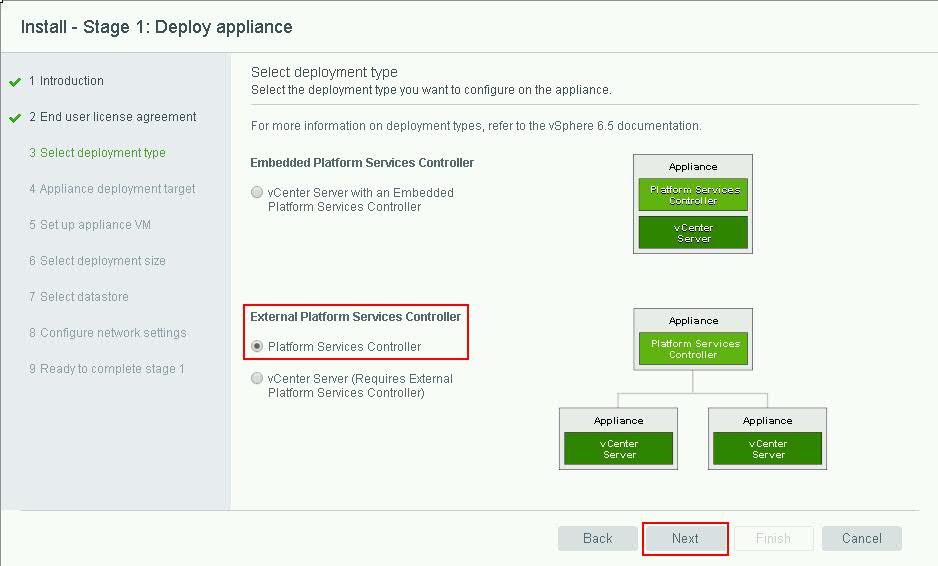
And here is the step that you are choosing if you want to deploy a vCenter Server with Embedded PSC or just a vCenter/PSC (of course if you go with just the vCenter Server Installation it has the prerequisite that you already have Platform Services Controller and SSO set it up, in my case I wanted to install the PSC.
Here you are importing to the installer the information on where the Appliance will be installed (ESXi host or vCenter Server), for me because I still don’t have vCenter Server working I had to give the ESXi target machine:

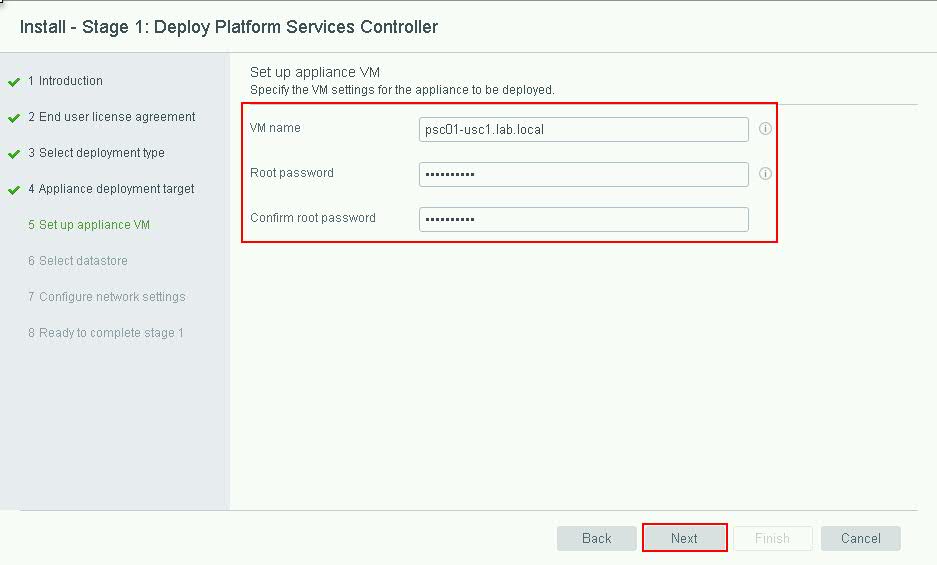
The next thing that it comes up of course is to give the name of the Platform Service Controller Virtual Machine and add the root password that you want to use:
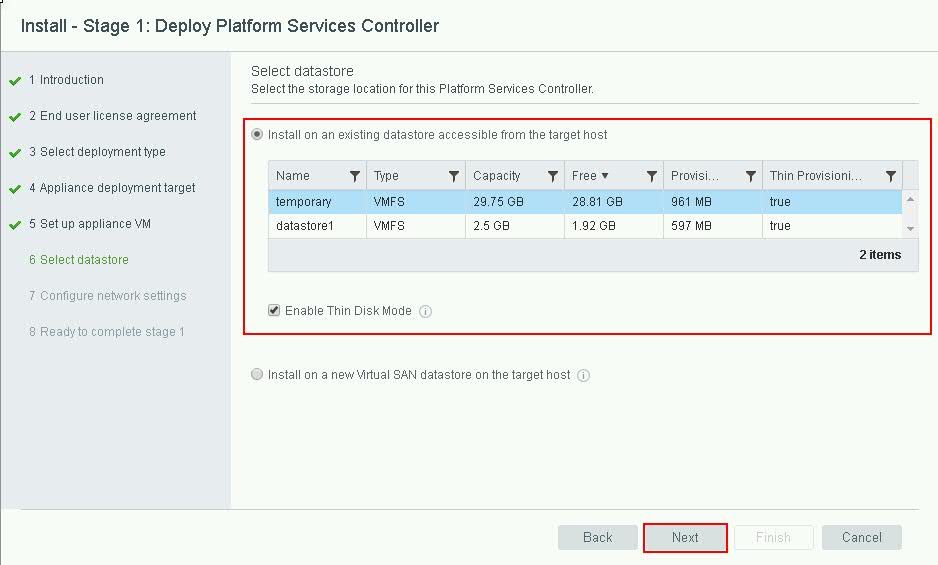
After this you have to choose your Datastore that you want to install the Virtual Machine and if it will be Thin Provisioned. I have it installed now on a “temporary” datastore because after my vCenter Server deployment will be migrated in my VSAN Cluster.
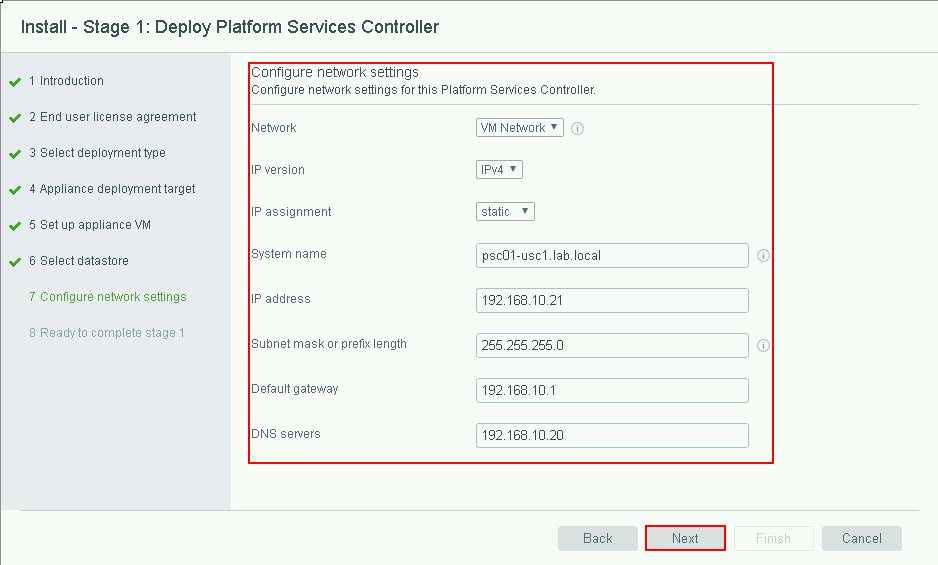
Last but not least you have to configure the Network configuration of the PSC and as well the System Name (based on this will be created the Certificate of the PSC). Note: As I said in the beginning of this post is mandatory to have working Forward and Reverse DNS otherwise you cannot proceed with the installation.
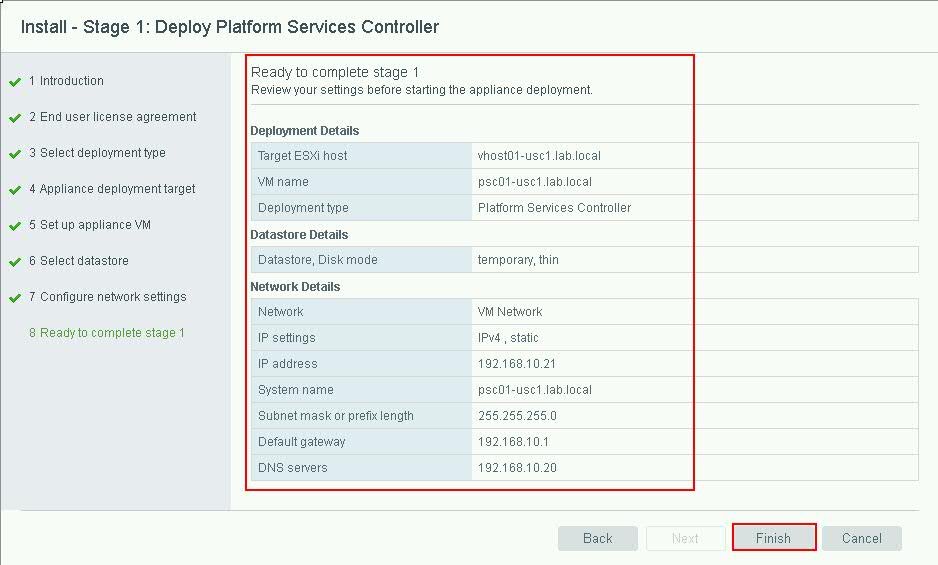
And after this click Finish.
Now you are suppose to see this screen and wait for the installer to be finished (in a production environment with Version 6.0 the installer is finishing successfully and also some other colleagues in other environments for them worked without any problem so I would suggest to give it a try at least once it may not happen to you the same problem like me)
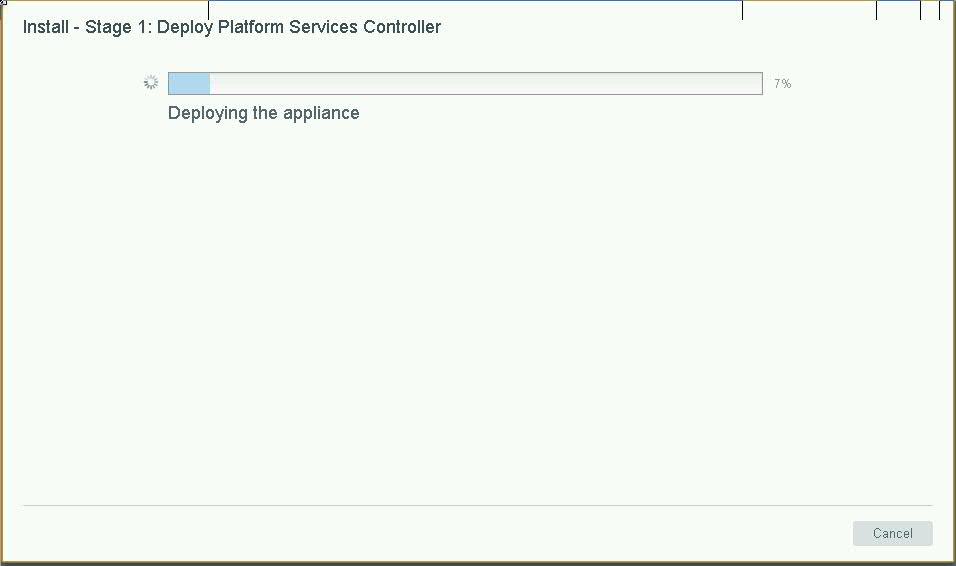
Whatever this will happen after you have to proceed with the Stage 2 of the process.
VMware Platform Service Controller Installation - Stage 2:
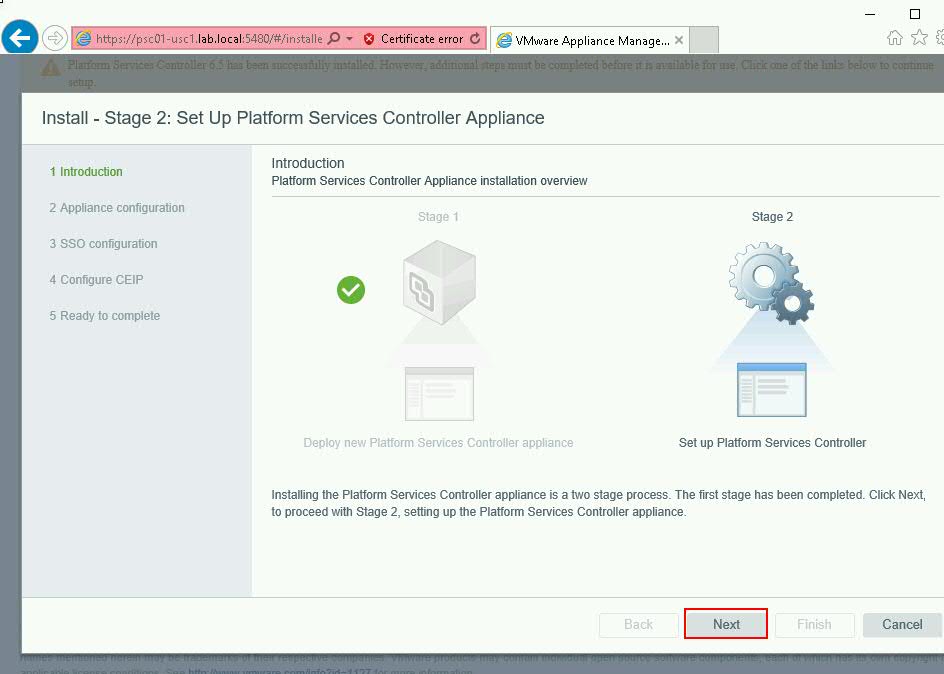
After booting the Appliance and finishing with the installation it will tell you that in order to continue with the installation you have to go on the Web GUI of the PSC https://:5480 in order to continue with the installation, when you will browse there you will see the following screen that is informing you that now you are in the Second stage of the process, just click Next:
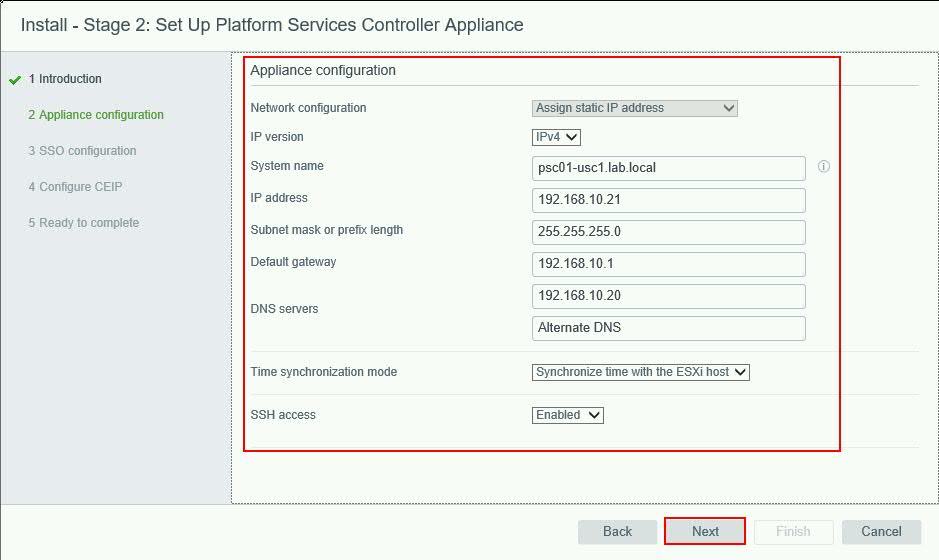
The following screen is to configure the appliance (oh yes, this you done it again on the Stage 1, just do it once again, it never gets old)
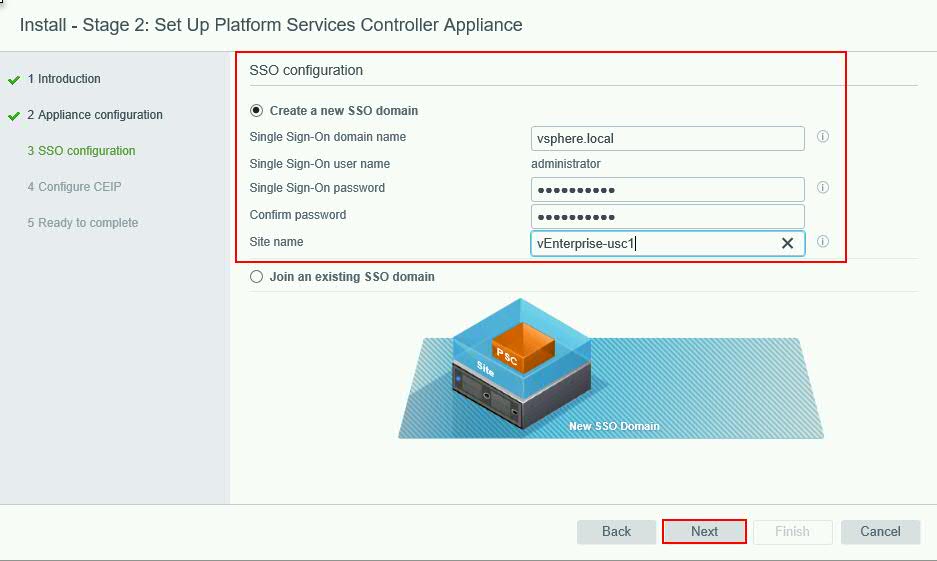
Now you have to Create the SSO domain or to Join your Platform Services Controller to an existing SSO domain:
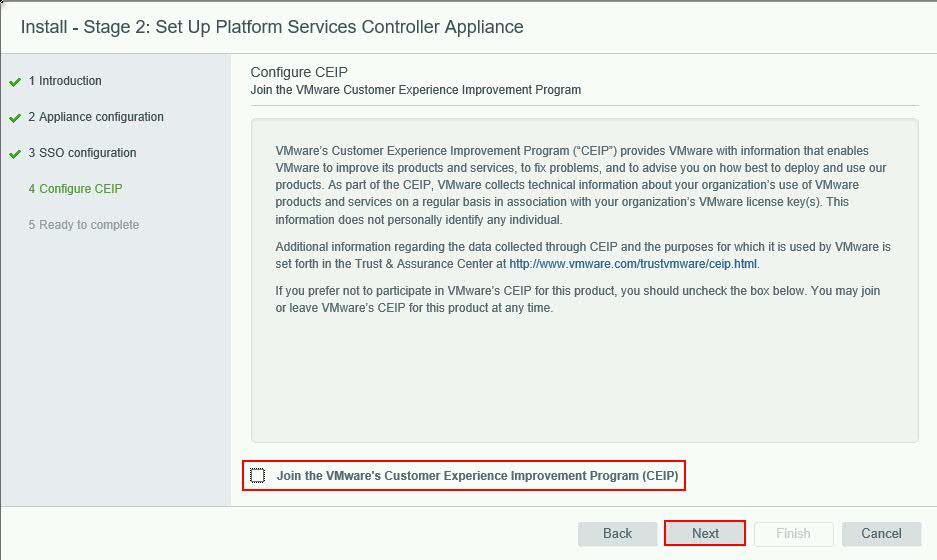
Of course you are asked to join the CEIP (Customer Experience Improvement Program), normally I support these kind of things especially on a Lab environment, in the current case because there is only public access to my jump host through RDP there is no reason to enable it but I am highly suggest in case you are running this on a lab and has internet access to join, it helps a lot VMware to analyze issues and data (hmmm… this not heard that good..anyway!)
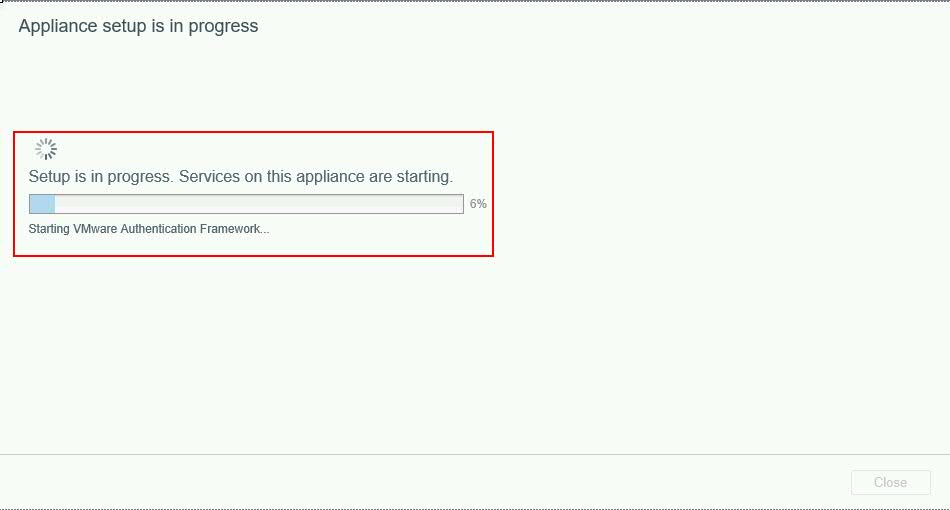
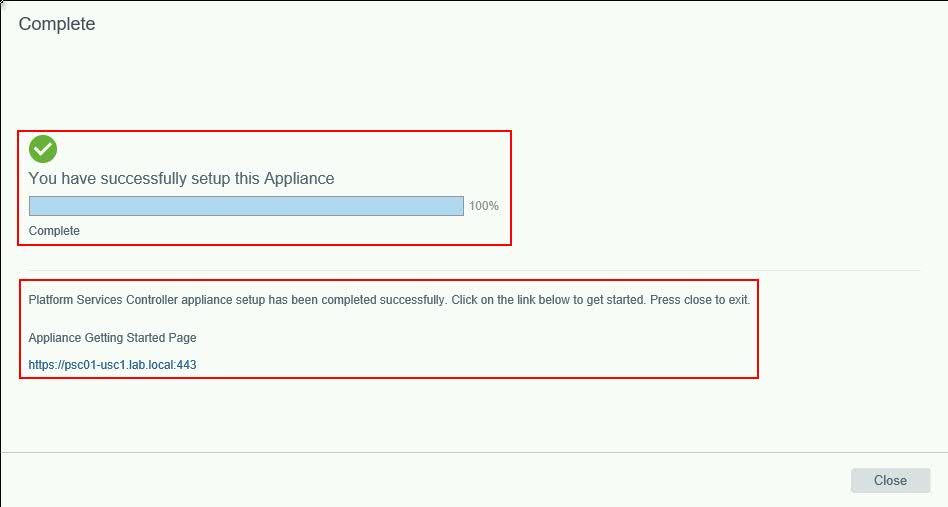
After this you will see the progress bar of configuring the services of the appliance and hopefully this comes as well with a Completed successfully page:
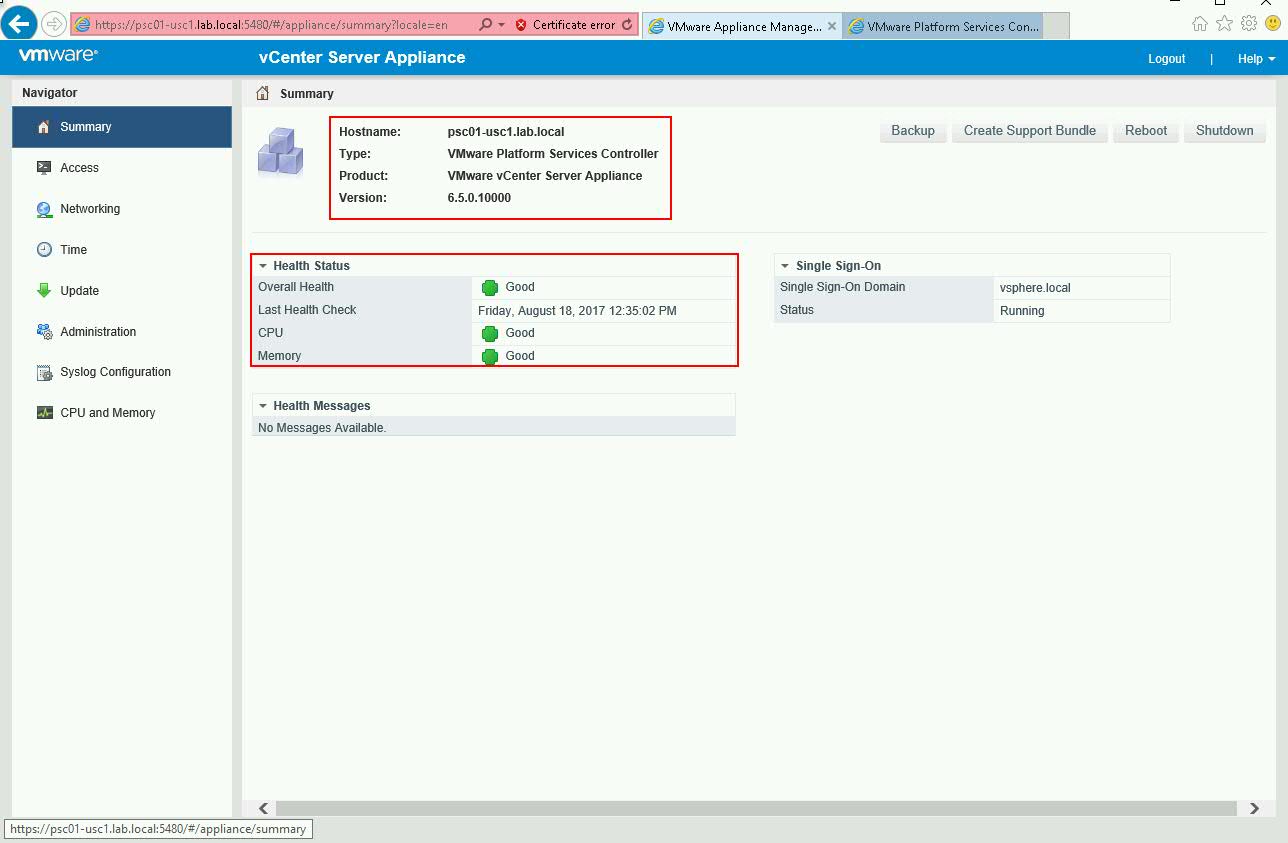
After finishing the installation you can stay on the same page normally it looks like this, where you can configure different settings for your appliance, backup and restore, see the health status, NTP etc:
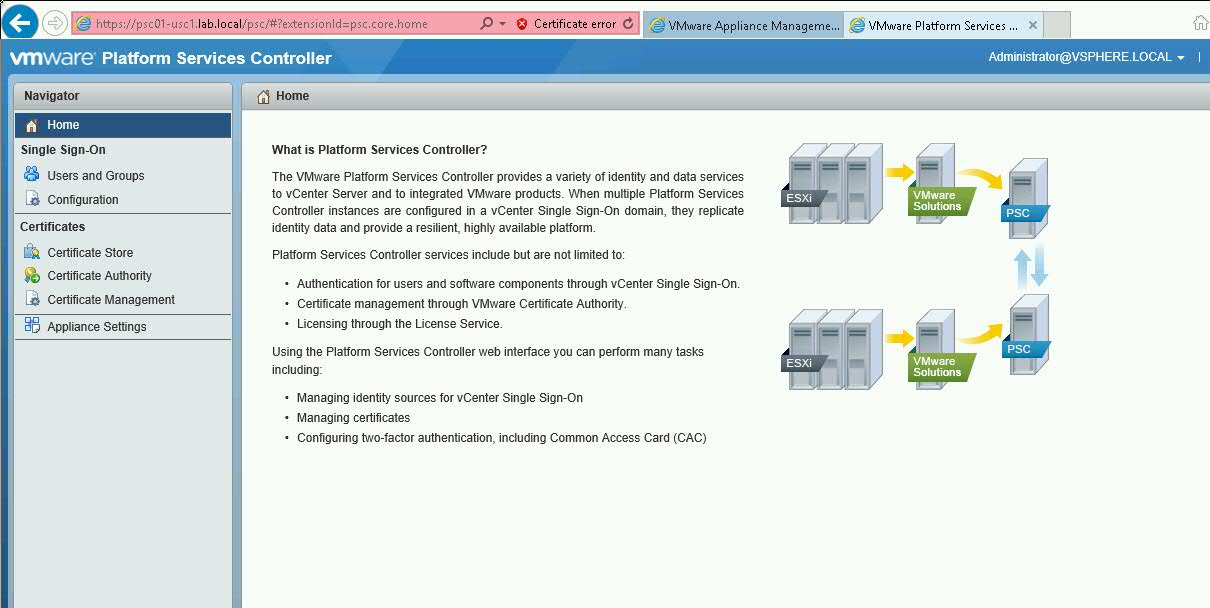
And also you can go on the https://<psc\_ip\_or\_fqdn>:443 and you can configure your SSO domain with adding identity services if you want AD Integration or adding users & groups:
One thing that I want to mention is that after all these I’ve seen a strange behavior through my ESXi host that the Appliance is not reporting the VMware tools that are running and as well the Network Information. I am in the middle of troubleshooting so most probably in the next blog post I will have notes as well.
Related article with vEnterprise (Home Lab) goes wild:
- vEnterprise (Home Lab) goes wild Part 1 - Design Considerations
- vEnterprise (Home Lab) goes wild Part 2 - Platform Services Controller 6.5 Update 1 Installation
Thank you for your reading and stay tuned, Part 3 is coming soon…
Have a nice day!